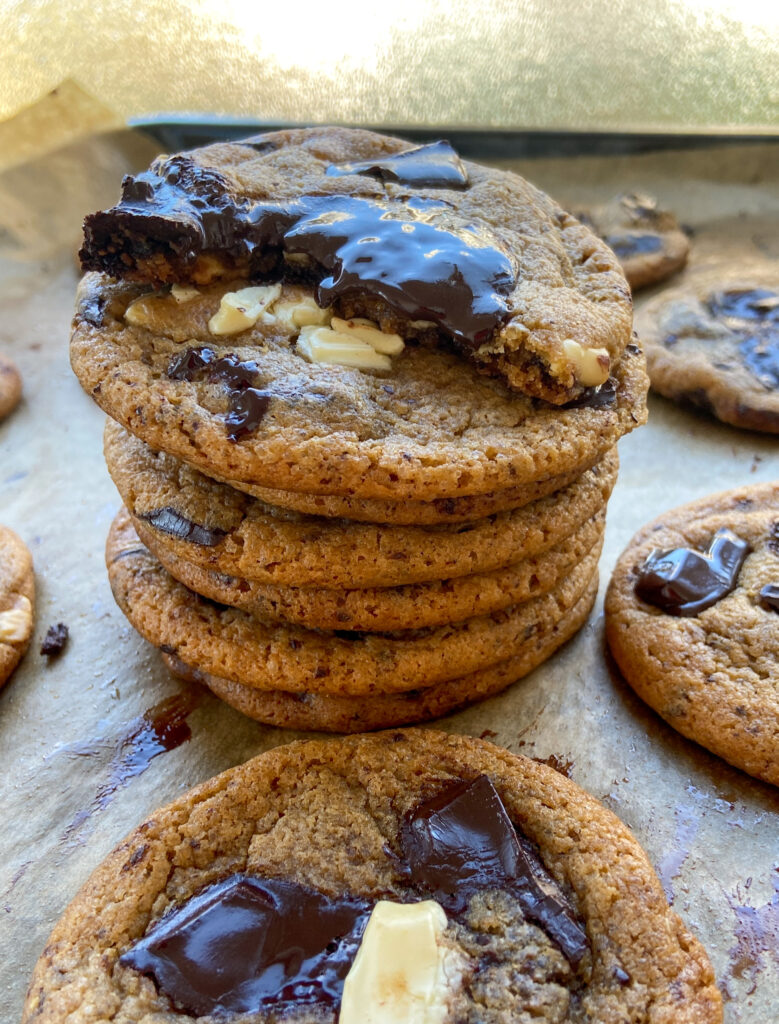
Everybody thinks they have the best chocolate chip cookie recipe and I don’t blame them. Chocolate chip cookies are so persuasive. But if you still haven’t found your go-to recipe, this one’s for you. Especially if your ideal cookie is not overly sweet, has a good amount of chocolate, and has a crisp but most importantly, a fudgy and soft center.

These cookies are not overly sweet because this recipe uses less sugar than the average cookie recipe and the secret ingredient…instant coffee powder! Don’t worry if you’re not a coffee fan, you can barely taste the coffee, it’s just there for balance. My biggest pet peeve when it comes to cookies is when I can feel the sugar crystals when chewing. You won’t have that problem with these. Now let’s talk chocolate…I always prefer chocolate chunks rather than chocolate chips. The large chunks of chocolate create melty pools of chocolate in your cookie and the shreds from the chopping melt into the dough. Also, I find it more aesthetically pleasing. And for the type of chocolate, avoid using just milk or white chocolate if you don’t want your cookies to be too sweet. Using semi-sweet, or 60%-70% chocolate is ideal. I went with 60g 60% percent chocolate, 70g 70% chocolate, and 70g white chocolate. And don’t worry, every kid who’s ever had these cookies loved them so they’re not bitter at all. Also, this goes without saying, opt for good quality chocolate.
When it comes to these heavenly cookies, don’t skip browning your butter! I first tried browning my butter a few years ago and never looked back. It makes such a big difference. Those caramelized milk solids in the butter add such a subtle nutty flavor. For baking, I always recommend using a scale. If you haven’t had much luck when it comes to baking, chances are you aren’t weighing your ingredients. Weighing your ingredients is far more accurate than using measuring cups and will give you consistent results every time you make the recipe.

Brown Butter Chocolate Chunk Cookies
Prep time: 15 minutes
Chill time: 30 minutes- overnight
Bake time: 11 minutes
Serving: 15 medium-sized cookies
Ingredients
115g unsalted butter, melted
50g white sugar (¼ cup)
150g brown sugar (¾ cup)*
2 tsp instant coffee powder*
1 large egg, room temperature
155g all-purpose flour
½ tsp baking soda
1 tsp salt
200g chocolate (I used 60g of 60%, 70g of 70%, and 70g white chocolate)
Notes:
- If you don’t have brown sugar, mix 2 tsp of molasses with ¾ cup of white sugar. In total, we’re using 1 cup of sugar.
- Though 2 tsp might seem like a lot, you will barely be able to taste the coffee. It’s just there to balance out the sweetness and complement the other flavors. If you’d like a stronger coffee taste, add an extra teaspoon of instant coffee powder. And yes, it has to be instant coffee powder, or else it won’t dissolve.
Instructions:
1. Melt the butter in a small pot over the stovetop. Let it bubble away until it’s foamy and you can see golden brown milk solids at the bottom. It’s important to push away the foam every minute so you can see whether the butter has browned or not. Mine took around 4 minutes but the time depends on your butter. Be careful as this can burn quickly. Once it’s almost your desired shade (it will continue browning off the heat), take it off the heat and let it cool for a few minutes.
2. While it’s cooling, chop your chocolate bars into medium-large chunks and take out ½ cup for topping the cookies. If your instant coffee powder is coarse, grind it into a fine powder. This way it dissolves faster in the mixture.
3. Once cooled but still slightly warm, transfer the brown butter into a mixing bowl, along with the sugars and the instant coffee powder. Whisk vigorously. We want some of the sugar to melt into the butter. Make sure the mixture is not too warm and then crack in the egg. If the mixture is too warm, the eggs will scramble. Whisk vigorously for 1-2 minutes or until everything is emulsified. Little bubbles should appear when you stop whisking.
4. Now place a sieve over the bowl and add in the flour, baking soda, and salt. Sift in the dry ingredients. Fold until just combined. Add in the chocolate chunks and fold again. Avoid overmixing.
Once the dough is ready, scoop out uniform balls and place them on a greased plate. I like to use my scale to ensure that each dough ball roughly weighs the same (40-42g). This way they all bake in the same amount of time and they look more uniform. Once the dough balls are shaped, poke in a few chocolate chunks in each cookie to give it that bakery-made look. Cover with saran wrap and chill them in the fridge for a few hours. Make sure you chill them for at least 30 minutes (in the freezer). You could also chill them in the fridge overnight. The more they rest, the more the flavors have time to bloom and develop.
5. When you’re ready to bake, preheat the oven to 180C. Place the cookies on a lined baking sheet. Make sure they are placed apart from each other and the sides of the pan as these cookies do spread. My oven has a top/bottom heating setting and these cookies took 11 minutes to bake. You could just turn on the bottom of your oven, but the cookies might need more time to bake. You’ll know it’s ready when the edges are lightly browned. When they come out of the oven they might look undone, but they set as they cool. Let them cool for a few minutes before transferring them to a cooling rack.
Enjoy these decadent cookies paired with a cold glass of milk and their incredible smell. They become even fudgier the next day but make sure to store them in an airtight container. They’ll keep for up to 3 days on the counter although I’m sure they won’t last in your kitchen that long 🙂


